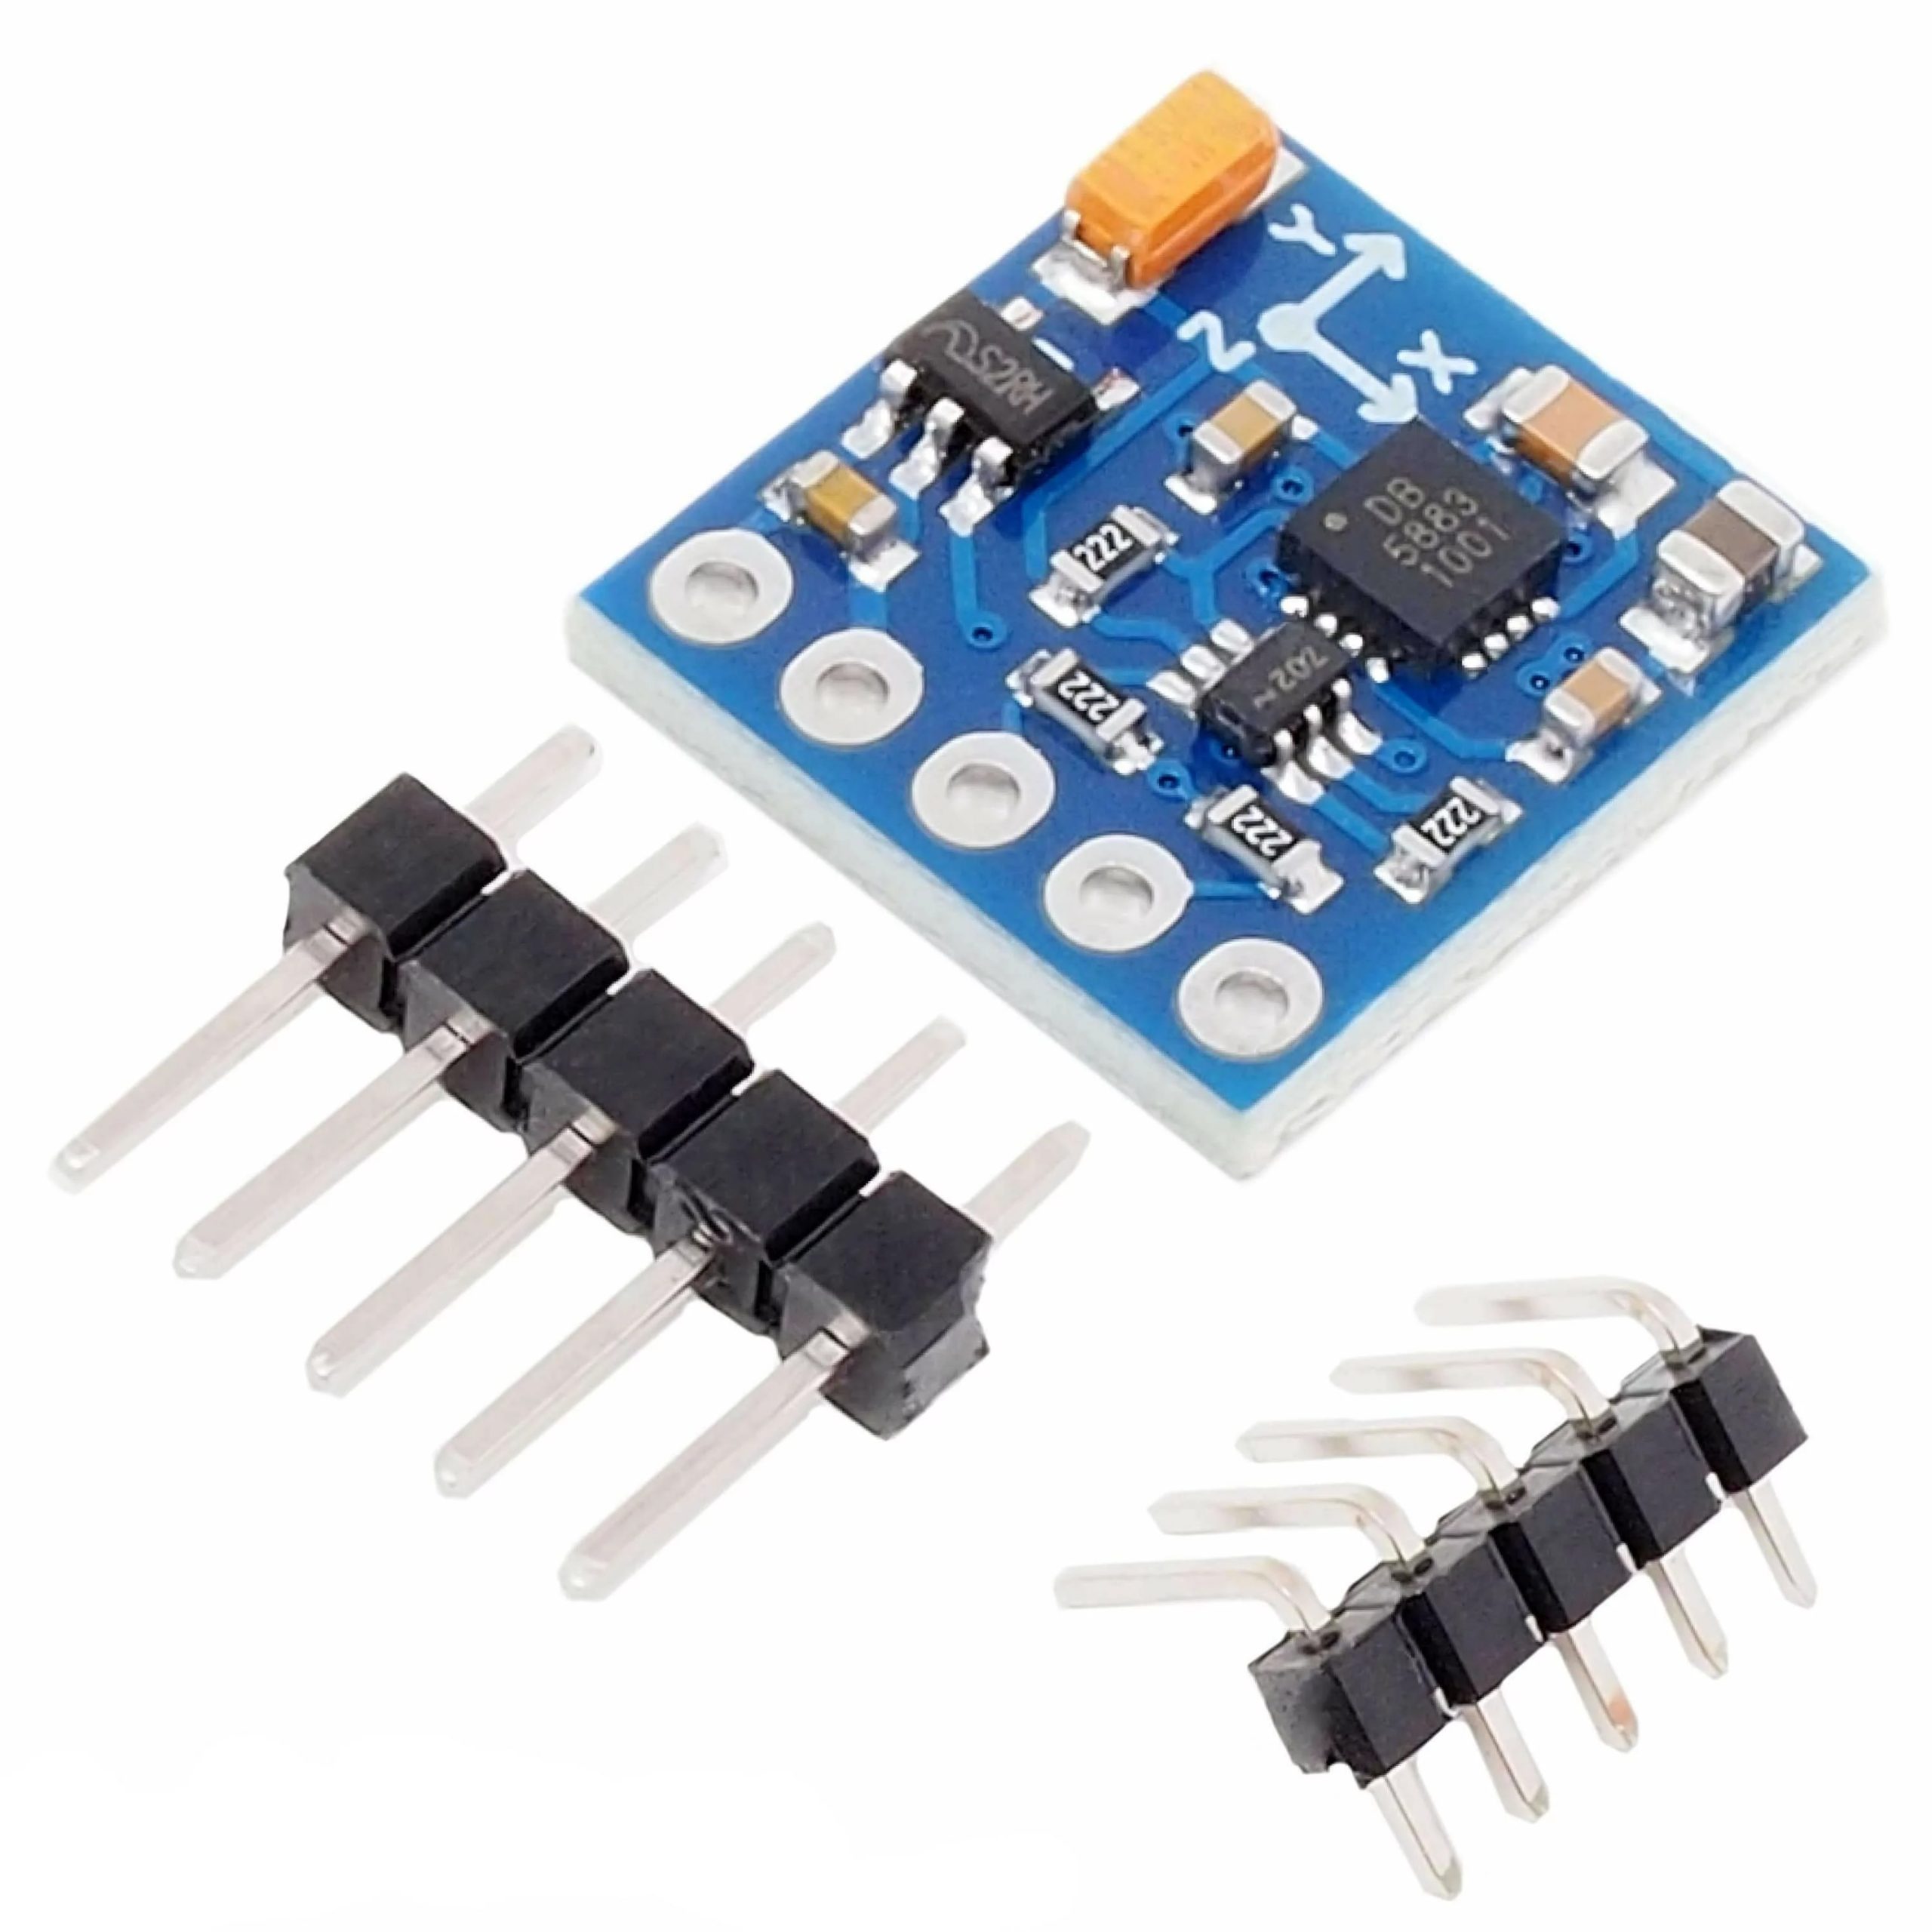
GY-271 HMC5883L Triple Axis Magnetometer Sensor Module

[wpdm_package id=’15834′]

  1. 3-axis magnetic electronic compass.
  2. Precise heading information.
  3. Operating Voltage: 3 -5 V DC.
  4. Driver Chip: HMC5883L.
  5. Communication: I2C protocol.
  6. Measuring range: ± 1.3-8 Gauss.

Apple Shopping Event

Hurry and get discounts on all Apple devices up to 20%

150,00 EGP

8 People watching this product now!

Payment Methods:

Description

The GY-271 HMC5883L Triple-Axis Magnetometer Sensor Module is a popular sensor used to measure the magnetic field in three dimensions (X, Y, and Z axes). It uses the HMC5883L magnetometer IC, which is designed for accurate and low-power magnetic field sensing, and is widely used in various applications like electronic compasses, robotics, and other systems where orientation and navigation are important.

Key Features of GY-271 HMC5883L Module:

  1. Triple-Axis Magnetic Field Measurement:

    • The sensor can measure the magnetic field along the X, Y, and Z axes, making it ideal for detecting the orientation and direction of the sensor relative to Earth’s magnetic field.
  2. Range of ±1.3 to ±8 Gauss:

    • The HMC5883L has a configurable sensitivity range of ±1.3 Gauss to ±8 Gauss, which determines how sensitive the sensor is to the Earth’s magnetic field. The default range is typically set to ±1.3 Gauss for most applications, providing good resolution for compass or heading applications.
  3. Digital Output (I2C Interface):

    • The HMC5883L communicates with a microcontroller (like Arduino) using the I2C protocol. This makes it easy to connect and interact with microcontrollers, as only two wires (SCL and SDA) are needed for communication, in addition to power and ground.
  4. Low Power Consumption:

    • The module operates with low power, making it suitable for battery-powered applications. It’s typically used in systems where power consumption is a concern, such as portable devices and mobile robotics.
  5. Integrated Temperature Compensation:

    • The HMC5883L includes built-in temperature compensation to reduce temperature-induced errors in the magnetometer readings.
  6. Small Form Factor:

    • The GY-271 module is small and easy to integrate into various projects. Its compact size makes it ideal for portable devices and systems with limited space.
  7. Onboard Voltage Regulator:

    • The GY-271 module typically includes an onboard voltage regulator, so it can be powered by a range of voltages (usually 3.3V to 5V).
  8. Pre-calibrated Output:

    • The module comes with pre-calibrated data output, making it easier for users to obtain readings without needing to perform complex calibration procedures.

Pinout of GY-271 HMC5883L Module:

The GY-271 HMC5883L module typically has the following pins:

Pin Name Description
VCC Power 3.3V to 5V input power.
GND Ground Ground connection.
SCL Serial Clock Line (I2C) Clock signal for I2C communication.
SDA Serial Data Line (I2C) Data signal for I2C communication.
DRDY Data Ready (optional) Output pin to indicate that new data is available (optional).
ADDR I2C Address Select Used to set the I2C address (typically either 0x1E or 0x1D).

Connecting the GY-271 HMC5883L to Arduino:

To connect the GY-271 HMC5883L to an Arduino (e.g., Arduino Uno), you need to connect the SCL and SDA pins of the module to the corresponding I2C pins on the Arduino. Here’s how you can wire it:

  • VCC (GY-271) → 5V (Arduino)
  • GND (GY-271) → GND (Arduino)
  • SCL (GY-271) → A5 (Arduino Uno) (SCL Pin)
  • SDA (GY-271) → A4 (Arduino Uno) (SDA Pin)

Note: The wiring may be different if you’re using a different Arduino model (like Arduino Mega), as the I2C pins may be different.

Example Arduino Code to Read Data from the GY-271 HMC5883L Module:

You can use the Wire library in the Arduino IDE for I2C communication, along with an additional library like “Adafruit_HMC5883_U” (available in the Arduino library manager) to easily communicate with the sensor and get readings.

Here’s an example of how you can read the magnetic field values in all three axes (X, Y, and Z):

  1. Install the Adafruit HMC5883L Library:

    • Go to Sketch > Include Library > Manage Libraries.
    • In the library manager, search for “Adafruit HMC5883L” and install the library.
  2. Example Code:

cpp
#include
#include
#include

// Create an instance of the HMC5883L magnetometer
Adafruit_HMC5883_Unified mag = Adafruit_HMC5883_Unified(12345);

void setup() {
Serial.begin(9600);
Wire.begin();

// Initialize the magnetometer
if (!mag.begin()) {
Serial.println("Couldn't find HMC5883L sensor");
while (1);
}

// Set measurement mode to continuous
mag.setMode(Adafruit_HMC5883_U::MODE_CONTINUOUS);
}

void loop() {
// Create a variable to hold the magnetometer data
sensors_event_t event;

// Read the magnetic field data
mag.getEvent(&event);

// Print the magnetic field readings (X, Y, Z axes)
Serial.print("X: ");
Serial.print(event.magnetic.x);
Serial.print(" ");

Serial.print("Y: ");
Serial.print(event.magnetic.y);
Serial.print(" ");

Serial.print("Z: ");
Serial.print(event.magnetic.z);
Serial.println();

delay(500); // Delay for half a second before next reading
}

Explanation of the Code:

  • Adafruit_HMC5883_U.h: This is the header file for the Adafruit HMC5883L library, which simplifies interacting with the sensor.
  • mag.begin(): Initializes the magnetometer sensor.
  • mag.getEvent(): Reads the magnetic field strength in three axes (X, Y, Z) and stores the result in an event structure.
  • Serial.print(): Outputs the readings from the X, Y, and Z axes to the serial monitor.
  • MODE_CONTINUOUS: The sensor is set to continuously output data.

Applications of GY-271 HMC5883L:

  1. Electronic Compass:

    • Used in navigation systems and GPS units to provide orientation relative to Earth’s magnetic field.
  2. Robotics:

    • Used in robots for heading, orientation, and navigation, especially in autonomous or mobile robots.
  3. Geophysical Research:

    • Can be used to measure and monitor the magnetic field of the Earth or other objects in scientific studies.
  4. Augmented Reality (AR):

    • Helps determine the orientation of AR devices relative to magnetic North, improving accuracy in AR applications.
  5. Smartphones and Wearable Devices:

    • Integrated in mobile devices to provide compass functionalities.
  6. Magnetic Field Detection:

    • Used in industrial applications for detecting magnetic fields and anomalies.

Tips:

  1. Calibration: The HMC5883L magnetometer requires calibration for accurate heading and orientation readings. To get accurate compass heading, you’ll need to calibrate the sensor by moving it in all directions to map the Earth’s magnetic field.
  2. Interference: The sensor can be affected by local magnetic fields such as from motors, wires, or metal objects. It’s important to avoid placing the sensor near such sources of interference for best accuracy.
  3. Power Supply: If you’re using the module in a battery-powered project, ensure that your power supply is stable and meets the voltage requirements (typically 3.3V to 5V).
🔌
Pin Connections
1 Table
Pin Connections Table 1
BoardSensor PinConnection
HMC5883LVCC/GND/SDA/SCL3.3-5V / GND / board SDA / board SCL
📟
GY-271 HMC5883L Triple Axis Magnetometer Sensor Module
7 Examples • C/C++ | Boards: Arduino Uno, Arduino Nano, Arduino Mega, ESP32, ESP8266, STM32, Raspberry Pi Pico
GY-271 HMC5883L Triple Axis Magnetometer Sensor Module - Arduino Uno
GY-271 HMC5883L Triple Axis Magnetometer Sensor Module - Arduino Nano
GY-271 HMC5883L Triple Axis Magnetometer Sensor Module - Arduino Mega
GY-271 HMC5883L Triple Axis Magnetometer Sensor Module - ESP32
GY-271 HMC5883L Triple Axis Magnetometer Sensor Module - ESP8266
GY-271 HMC5883L Triple Axis Magnetometer Sensor Module - STM32
GY-271 HMC5883L Triple Axis Magnetometer Sensor Module - Raspberry Pi Pico
📄 File: gy-271_hmc5883l_triple_axis_magnetometer_sensor_module_-_arduino_uno.inoArduino Uno
990 characters
1//ekostra.com
2//electronics store in egypt
3//+201008896258
4
5// I2C wiring for Arduino Uno: A4=SDA, A5=SCL. VCC->3.3V or 5V per module label, GND->GND.
6#include <Wire.h>
7#include <Adafruit_Sensor.h>
8#include <Adafruit_HMC5883_U.h>
9
10Adafruit_HMC5883_Unified mag = Adafruit_HMC5883_Unified(12345);
11
12void setup() {
13 Serial.begin(115200);
14 Wire.begin();
15 if (!mag.begin()) {
16 Serial.println("HMC5883L not found - check wiring!");
17 while (1) delay(10);
18 }
19}
20
21void loop() {
22 sensors_event_t event;
23 mag.getEvent(&event);
24
25 float heading = atan2(event.magnetic.y, event.magnetic.x);
26 if (heading < 0) heading += 2 * PI;
27 float heading_deg = heading * 180 / PI;
28
29 Serial.print("X: "); Serial.print(event.magnetic.x); Serial.print(" ");
30 Serial.print("Y: "); Serial.print(event.magnetic.y); Serial.print(" ");
31 Serial.print("Z: "); Serial.print(event.magnetic.z); Serial.print(" ");
32 Serial.print("Heading: "); Serial.print(heading_deg); Serial.println(" deg");
33
34 delay(200);
35}
📄 File: gy-271_hmc5883l_triple_axis_magnetometer_sensor_module_-_arduino_nano.inoArduino Nano
991 characters
1//ekostra.com
2//electronics store in egypt
3//+201008896258
4
5// I2C wiring for Arduino Nano: A4=SDA, A5=SCL. VCC->3.3V or 5V per module label, GND->GND.
6#include <Wire.h>
7#include <Adafruit_Sensor.h>
8#include <Adafruit_HMC5883_U.h>
9
10Adafruit_HMC5883_Unified mag = Adafruit_HMC5883_Unified(12345);
11
12void setup() {
13 Serial.begin(115200);
14 Wire.begin();
15 if (!mag.begin()) {
16 Serial.println("HMC5883L not found - check wiring!");
17 while (1) delay(10);
18 }
19}
20
21void loop() {
22 sensors_event_t event;
23 mag.getEvent(&event);
24
25 float heading = atan2(event.magnetic.y, event.magnetic.x);
26 if (heading < 0) heading += 2 * PI;
27 float heading_deg = heading * 180 / PI;
28
29 Serial.print("X: "); Serial.print(event.magnetic.x); Serial.print(" ");
30 Serial.print("Y: "); Serial.print(event.magnetic.y); Serial.print(" ");
31 Serial.print("Z: "); Serial.print(event.magnetic.z); Serial.print(" ");
32 Serial.print("Heading: "); Serial.print(heading_deg); Serial.println(" deg");
33
34 delay(200);
35}
📄 File: gy-271_hmc5883l_triple_axis_magnetometer_sensor_module_-_arduino_mega.inoArduino Mega
993 characters
1//ekostra.com
2//electronics store in egypt
3//+201008896258
4
5// I2C wiring for Arduino Mega: D20=SDA, D21=SCL. VCC->3.3V or 5V per module label, GND->GND.
6#include <Wire.h>
7#include <Adafruit_Sensor.h>
8#include <Adafruit_HMC5883_U.h>
9
10Adafruit_HMC5883_Unified mag = Adafruit_HMC5883_Unified(12345);
11
12void setup() {
13 Serial.begin(115200);
14 Wire.begin();
15 if (!mag.begin()) {
16 Serial.println("HMC5883L not found - check wiring!");
17 while (1) delay(10);
18 }
19}
20
21void loop() {
22 sensors_event_t event;
23 mag.getEvent(&event);
24
25 float heading = atan2(event.magnetic.y, event.magnetic.x);
26 if (heading < 0) heading += 2 * PI;
27 float heading_deg = heading * 180 / PI;
28
29 Serial.print("X: "); Serial.print(event.magnetic.x); Serial.print(" ");
30 Serial.print("Y: "); Serial.print(event.magnetic.y); Serial.print(" ");
31 Serial.print("Z: "); Serial.print(event.magnetic.z); Serial.print(" ");
32 Serial.print("Heading: "); Serial.print(heading_deg); Serial.println(" deg");
33
34 delay(200);
35}
📄 File: gy-271_hmc5883l_triple_axis_magnetometer_sensor_module_-_esp32.inoESP32
992 characters
1//ekostra.com
2//electronics store in egypt
3//+201008896258
4
5// I2C wiring for ESP32: GPIO21=SDA, GPIO22=SCL. VCC->3.3V or 5V per module label, GND->GND.
6#include <Wire.h>
7#include <Adafruit_Sensor.h>
8#include <Adafruit_HMC5883_U.h>
9
10Adafruit_HMC5883_Unified mag = Adafruit_HMC5883_Unified(12345);
11
12void setup() {
13 Serial.begin(115200);
14 Wire.begin();
15 if (!mag.begin()) {
16 Serial.println("HMC5883L not found - check wiring!");
17 while (1) delay(10);
18 }
19}
20
21void loop() {
22 sensors_event_t event;
23 mag.getEvent(&event);
24
25 float heading = atan2(event.magnetic.y, event.magnetic.x);
26 if (heading < 0) heading += 2 * PI;
27 float heading_deg = heading * 180 / PI;
28
29 Serial.print("X: "); Serial.print(event.magnetic.x); Serial.print(" ");
30 Serial.print("Y: "); Serial.print(event.magnetic.y); Serial.print(" ");
31 Serial.print("Z: "); Serial.print(event.magnetic.z); Serial.print(" ");
32 Serial.print("Heading: "); Serial.print(heading_deg); Serial.println(" deg");
33
34 delay(200);
35}
📄 File: gy-271_hmc5883l_triple_axis_magnetometer_sensor_module_-_esp8266.inoESP8266
1000 characters
1//ekostra.com
2//electronics store in egypt
3//+201008896258
4
5// I2C wiring for ESP8266: D2(GPIO4)=SDA, D1(GPIO5)=SCL. VCC->3.3V or 5V per module label, GND->GND.
6#include <Wire.h>
7#include <Adafruit_Sensor.h>
8#include <Adafruit_HMC5883_U.h>
9
10Adafruit_HMC5883_Unified mag = Adafruit_HMC5883_Unified(12345);
11
12void setup() {
13 Serial.begin(115200);
14 Wire.begin();
15 if (!mag.begin()) {
16 Serial.println("HMC5883L not found - check wiring!");
17 while (1) delay(10);
18 }
19}
20
21void loop() {
22 sensors_event_t event;
23 mag.getEvent(&event);
24
25 float heading = atan2(event.magnetic.y, event.magnetic.x);
26 if (heading < 0) heading += 2 * PI;
27 float heading_deg = heading * 180 / PI;
28
29 Serial.print("X: "); Serial.print(event.magnetic.x); Serial.print(" ");
30 Serial.print("Y: "); Serial.print(event.magnetic.y); Serial.print(" ");
31 Serial.print("Z: "); Serial.print(event.magnetic.z); Serial.print(" ");
32 Serial.print("Heading: "); Serial.print(heading_deg); Serial.println(" deg");
33
34 delay(200);
35}
📄 File: gy-271_hmc5883l_triple_axis_magnetometer_sensor_module_-_stm32.inoSTM32
1007 characters
1//ekostra.com
2//electronics store in egypt
3//+201008896258
4
5// I2C wiring for STM32: PB7=SDA, PB6=SCL (Blue Pill / F103C8). VCC->3.3V or 5V per module label, GND->GND.
6#include <Wire.h>
7#include <Adafruit_Sensor.h>
8#include <Adafruit_HMC5883_U.h>
9
10Adafruit_HMC5883_Unified mag = Adafruit_HMC5883_Unified(12345);
11
12void setup() {
13 Serial.begin(115200);
14 Wire.begin();
15 if (!mag.begin()) {
16 Serial.println("HMC5883L not found - check wiring!");
17 while (1) delay(10);
18 }
19}
20
21void loop() {
22 sensors_event_t event;
23 mag.getEvent(&event);
24
25 float heading = atan2(event.magnetic.y, event.magnetic.x);
26 if (heading < 0) heading += 2 * PI;
27 float heading_deg = heading * 180 / PI;
28
29 Serial.print("X: "); Serial.print(event.magnetic.x); Serial.print(" ");
30 Serial.print("Y: "); Serial.print(event.magnetic.y); Serial.print(" ");
31 Serial.print("Z: "); Serial.print(event.magnetic.z); Serial.print(" ");
32 Serial.print("Heading: "); Serial.print(heading_deg); Serial.println(" deg");
33
34 delay(200);
35}
📄 File: gy-271_hmc5883l_triple_axis_magnetometer_sensor_module_-_raspberry_pi_pico.inoRaspberry Pi Pico
1002 characters
1//ekostra.com
2//electronics store in egypt
3//+201008896258
4
5// I2C wiring for Raspberry Pi Pico: GPIO4=SDA, GPIO5=SCL. VCC->3.3V or 5V per module label, GND->GND.
6#include <Wire.h>
7#include <Adafruit_Sensor.h>
8#include <Adafruit_HMC5883_U.h>
9
10Adafruit_HMC5883_Unified mag = Adafruit_HMC5883_Unified(12345);
11
12void setup() {
13 Serial.begin(115200);
14 Wire.begin();
15 if (!mag.begin()) {
16 Serial.println("HMC5883L not found - check wiring!");
17 while (1) delay(10);
18 }
19}
20
21void loop() {
22 sensors_event_t event;
23 mag.getEvent(&event);
24
25 float heading = atan2(event.magnetic.y, event.magnetic.x);
26 if (heading < 0) heading += 2 * PI;
27 float heading_deg = heading * 180 / PI;
28
29 Serial.print("X: "); Serial.print(event.magnetic.x); Serial.print(" ");
30 Serial.print("Y: "); Serial.print(event.magnetic.y); Serial.print(" ");
31 Serial.print("Z: "); Serial.print(event.magnetic.z); Serial.print(" ");
32 Serial.print("Heading: "); Serial.print(heading_deg); Serial.println(" deg");
33
34 delay(200);
35}
I2C 3-axis digital compass/magnetometer.

نظرة عامة ومواصفات المنتج — بالعربية

GY-271 HMC5883L Triple Axis Magnetometer Sensor Module متوفر الآن في متجر إكوسترا للإلكترونيات، ضمن قسم IMU, Accelerometer, Magnetometer & Gyroscope وSensors، بسعر 150,00 EGP. كود المنتج لدينا: EK1558. المنتج متوفر في المخزون وجاهز للشحن الفوري لكل محافظات مصر مع إمكانية الدفع عند الاستلام.

أهم المواصفات الفنية:

  • Product Name: GY-271 HMC5883L Triple Axis Magnetometer Sensor Module
  • Type: Magnetometer / Compass Sensor
  • الموديل: HMC5883L
  • Axes: 3 (X, Y, Z)
  • واجهة الاتصال: I2C (SDA, SCL)
  • Supply Voltage: 3.3V – 5V DC
  • Measurement Range: ±8 Gauss
  • Resolution: 5 mG (typical)

هذا المنتج مناسب لمشاريع الأردوينو (Arduino) و ESP32 و Raspberry Pi، ومشاريع الروبوتات وإنترنت الأشياء والتعليم الهندسي. جميع القطع مفحوصة قبل الشحن.

تصفّح المزيد من IMU, Accelerometer, Magnetometer & Gyroscope في إكوسترا.

Specification

Specification

WeightWeight6 g
Dimensions2 × 1,5 × 0,5 cm
Product NameGY-271 HMC5883L Triple Axis Magnetometer Sensor Module
TypeMagnetometer / Compass Sensor
ModelHMC5883L
Axes3 (X, Y, Z)
InterfaceI2C (SDA, SCL)
Supply Voltage3.3V – 5V DC
Measurement Range±8 Gauss
Resolution5 mG (typical)
Data Rate0.75 Hz – 75 Hz
Operating Temperature Range-40°C – +85°C
Mounting TypePCB Module / Breadboard Compatible
MaterialFR-4 PCB with SMD Components
ApplicationsCompass Module, Navigation, Robotics, Arduino / DIY Projects
Package Contents1× GY-271 HMC5883L Triple Axis Magnetometer Sensor Module

Customer Reviews